|
|
||
| Have you ever been so late to class that you were forced to run with a backpack full of useless books? If so, you may conclude that you could have arrived sooner with more energy without the backpack. Well, your car is no different when it comes to hauling unnecessary weight around. When I discuss the term "Stage I weight reduction," it simply means making your car lighter to improve acceleration, braking, gas mileage and overall handling (by reducing loads on the engine, brakes and suspension). I try to stress the "I" part because this is the first series of steps required to making your car lighter. This process does not cost you any money, just time and comfort. | ||
 |
 |
Tar:
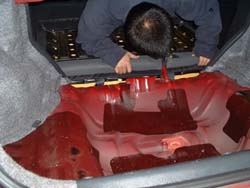
I started with the hardest part. Under the carpet, under the
standard sound-deadening fuzz, every car has a layer of tar. This
may seem strange, but cars are made of sheet metal and that sheet metal
- especially in large flat sheets like the floor of a car - can transmit
road and engine noise like a giant speaker. The easiest way to
damp out the vibrations that we hear as noise is to stick something
heavy and viscous to the surface of the metal. Tar fits the bill
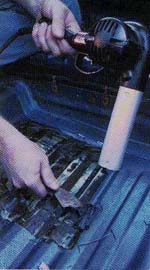
perfectly. There are actually a few different kinds of tar down there. Most of the car is covered with sheets that are relatively hard and stick to the car only because they were installed when they were hot and soft. On the rear wheel wells, though, there is a soft, gooey tar with a metal foil backing. This can be removed relatively easily by grabbing the foil, but try not to touch the tar itself. It will follow you around like grease from the Taco Bell. The hard tar on the floor is much trickier. If you live in a cool environment (like Wisconsin), your tar will be as hard as granite; in that case feel free to take a hammer and a scraper and give it a good pounding to break off the sheets in one or two pieces. Other wise, if you live in Palmdale CA, where the summers are hot as hell, there are a few alternatives. Pouring liquid nitrogen on the tar first allows you to chip it off in big chunks while the tar is frozen. I instead struck out across the acres of tar with heat guns and scrapers as my only weapons. Before I knew it, is was staring at a pile of ... tar (16.5 lbs). |
| Craig, a member of my racing team, is analyzing the heavy tar. | ||
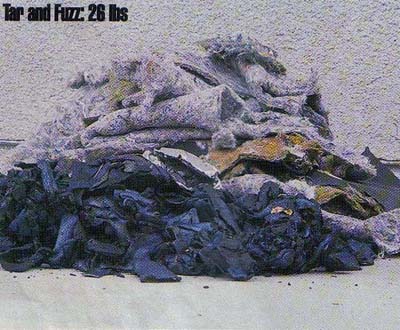 |
Fuzz: The first thing under the carpet is a lint-like layer of sound-deadening fuzz. I decided to leave the carpet itself in the car to give it at least some semblance of civility and to add to the "sleeper effect." Removal is simple, just grab big chunks of it and rip it out. The majority of the fuzz is glued to the bottom of the carpet. Lint might not seem like a very good place to save weight, but the sub-carpet fuzz that hangs against the firewall is actually backed by a heavy layer of what appears to be tar-soaked cardboard. The downside removing this stuff is increased noise, but since the carpet remains the noise is surprisingly tolerable (9.5 lbs). | |
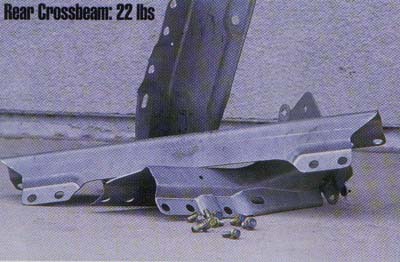 |
Metal thingy: While I was on my knees wallowing in a pool of sweat and tar, I noticed a big, shiny metal thingy. Under the bottom rear seat cushion, under the rear end of the carpet, is a big, three-piece metal brace. This is intended as a side-impact reinforcement, therefore is it important in terms of safety. Simply weld a bar in its place of a light-weight metal to keep your car reinforced (22 lbs). | |
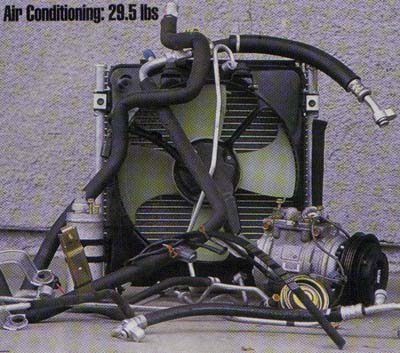 |
A/C:
Removing the air conditioning was an obvious, but nonetheless
difficult decision. Air conditioning is a big, heavy,
power-sapping contraption that is worth every bit of its weight on a hot
summer day. Fortunately I no longer reside in Palmdale, but in San
Luis Obispo; Air conditioning is not necessary near the cool beaches. The first step to removing the air conditioning is to drain the refrigerant. This takes special tool, special equipment, and a special license from the EPA. To do this legally don't be surprised to pay a local repair shop dude $25 for the evacuation process. The rest of the job was standard hack-and-pull. The Civic is fairly unique in that the radiator and air conditioning condenser are side by side in the front of the engine compartment. Typically, the condenser sits in front of the radiator, but through the miracle of tiny radiators, Honda was able to arrive at this easy-to-remove system. Once removed, there is a giant hole in the front of the car. While it might be fun to look at your header throughout the grill, think about what you would do if you were air. You would run right through that hole instead of squeezing through that claustrophobic radiator. After studying aerodynamics, I found that air is lazy. With the extra space I now have the option of tossing in a full-width Integra radiator, or just simply covering up the whole with a piece of sheet metal (29.5 lbs). |
|
|
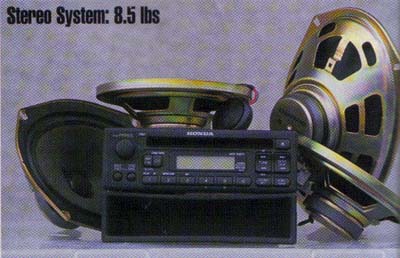
Stereo Let's face it, after working in the car audio dept. at Best Buy for so long, I can write pages of reasons why stock stereos always suck. After killing the wiring, speakers and head unit from the SI I was left with nothing but a couple of *holes in the doors and an empty space in the dash. Just go ahead and replace the space in the dash with 1)nothing 2)carbon fiber 3)plastic 4)sheet metal 5)gauges 6)in-dash monitor. *Note- These holes produce higher quality sound than the stock speakers (8.5 lbs). | |
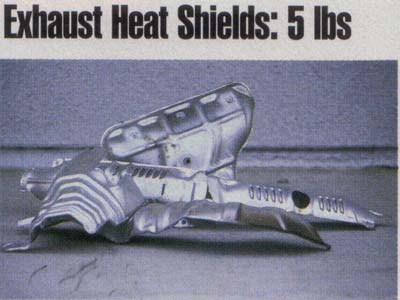 |
Heat shields: The stock exhaust system is riddled with heat shields. Those before the catalytic converter help somewhat in speeding converter lightoff, those on and after the converter are really just there to keep the carpet from melting and the grass under the car from catching fire. Who needs that? All together the various exhaust manifold, catalytic converter and exhaust heat shields can be removed to further lengthen my stage I weight reduction process (5 lbs). | |
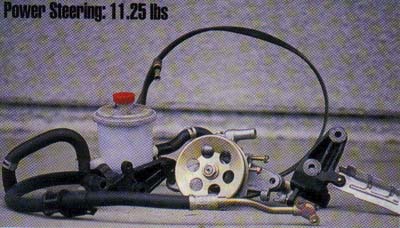 |
Power Steering: Now wait just a minute, I'm not ready to lose the power steering, its a new car! | |
 |
Back seat:
The back seat can be pulled out so easily, that your mom can
probably do it faster than you can. All I had to do was remove a
few 14mm and 10 mm bolts, then a few panels, and finally remove the pin
that holds them in.
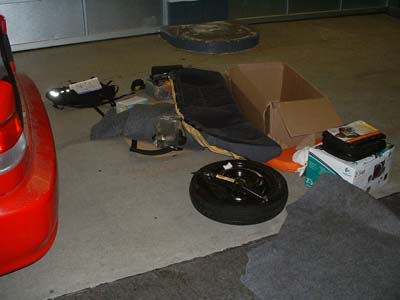
Spare tire: The spare tire weighs a lot, just try picking yours up. Now it may look small for a tire, but with my six months of experience of changing tires you can be assured that this tire is noticeable in your trunk. If you plan on traveling long distances be sure to drop this baby right back in (temporarily)! I am pretty sure that I will never get a flat tire because I always keep a good psi and I do not drive in places where I am not supposed to! Random stuff can still pop your tire, even when you are careful, so be cautious. |
|
 |
Leftovers: After weighing my garbage, there was still a pile of nuts, bolts and brackets along with sundry little bits that fell out of the bigger piles of junk. After about 2 minutes of cleaning up, carefully observe the larger amount of metallic crap and think about where you want to abandon it (7 lbs). | |
| To wrap things up, a total of 100+ lbs was
reduced during this procedure. And the hours upon hours of
extensive labor necessary to perform this was worth it.
Many may think that I am crazy for reducing my Civic's weight the proper way. But remember, I have a strong passion for cars. So I will not be happy unless whatever I do is done correctly. If you remember anything, remember this: for every 100 pounds you lose, you shave 1/10 sec. off of every quarter mile run. Also, for every 250 lb dude straddling one of your seats, go ahead and scratch 2 miles per gallon off your overall performance. |
||